Expand The App bar in Flutter to Allow Multi-Line Title?
Asked Answered
I

8

32

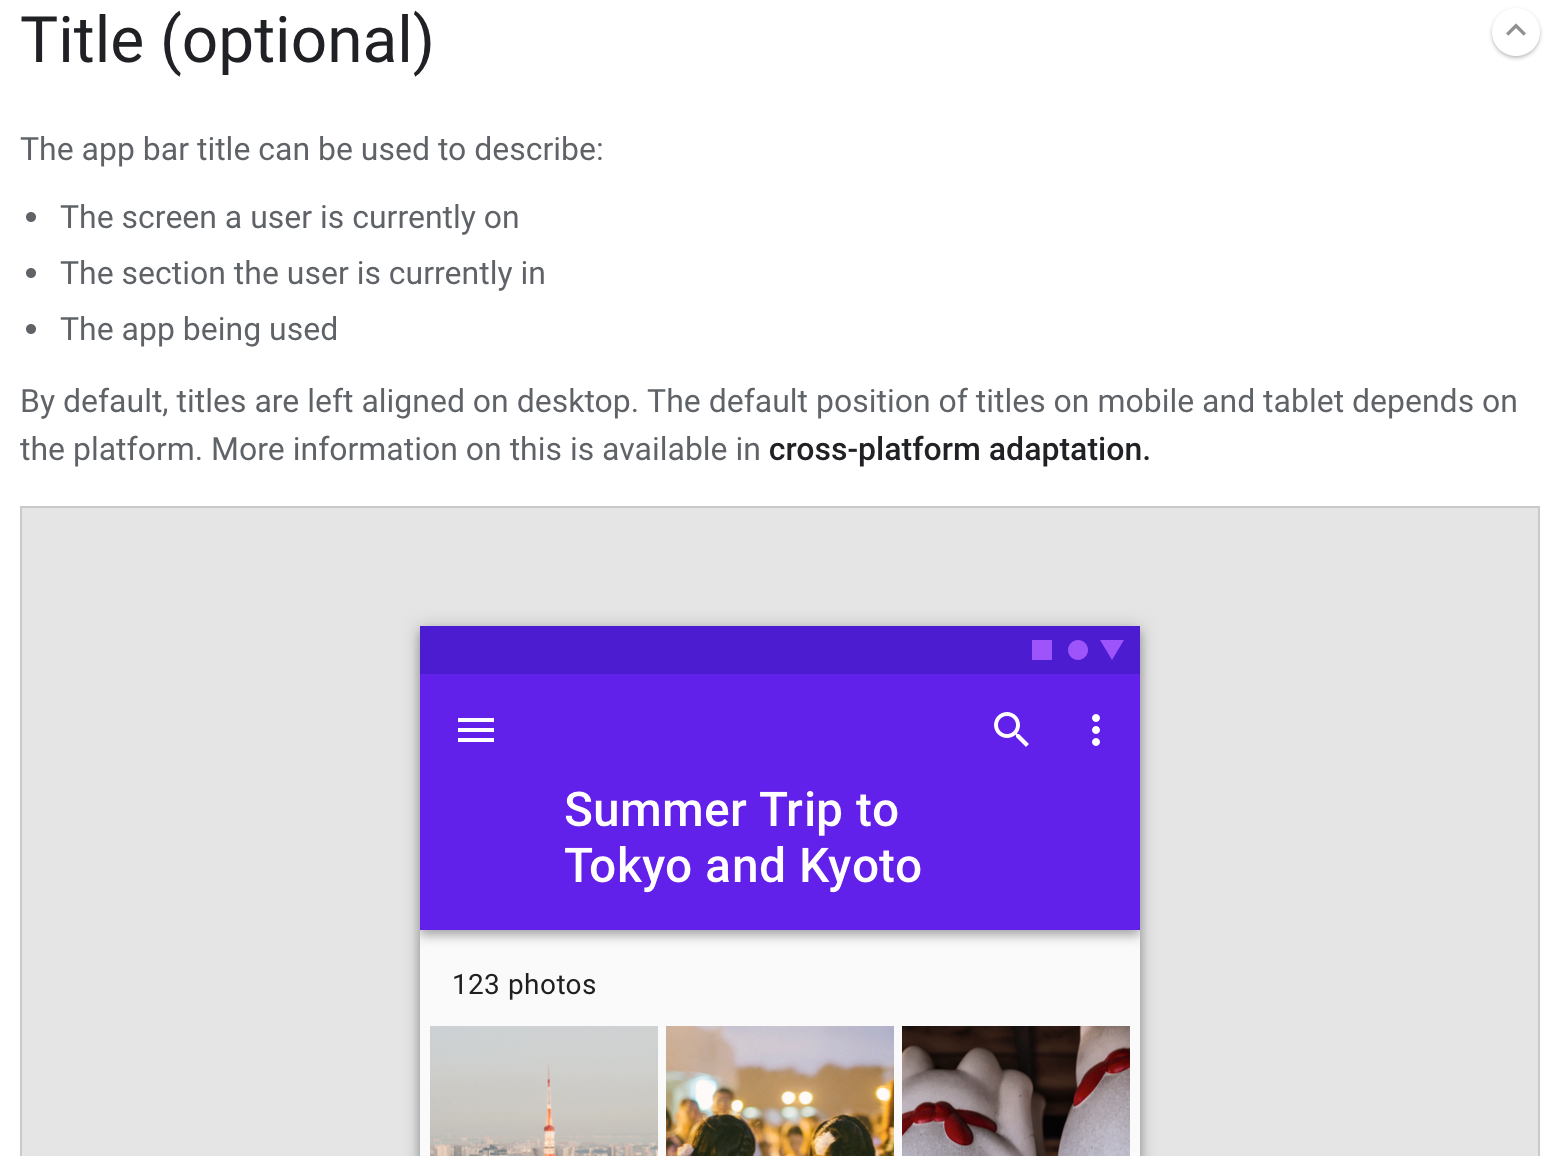
Does anyone know how I can create an app bar with a multi-line title, as per the material guidelines show here?

https://material.io/design/components/app-bars-top.html#anatomy

Multi-line app bar

Any ideas how to do this? It seems like it should be straightforward given that it's part of the material guidelines! Worth pointing out that the title is user defined, so I want to allow the app bar to expand from a single line to multiple lines (perhaps with a limit imposed) depending on user input.

Mike

Ib answered 8/6, 2018 at 16:7 Comment(0)
H
12

This is not implemented yet.

However you can achieve similar results by using SliverAppBar designed for CustomScrollView.

Bear in mind that this is not optimal though. As it required hard coding the size of the icons and stuff. Due to FlexibleSpacebar not having width constraint.

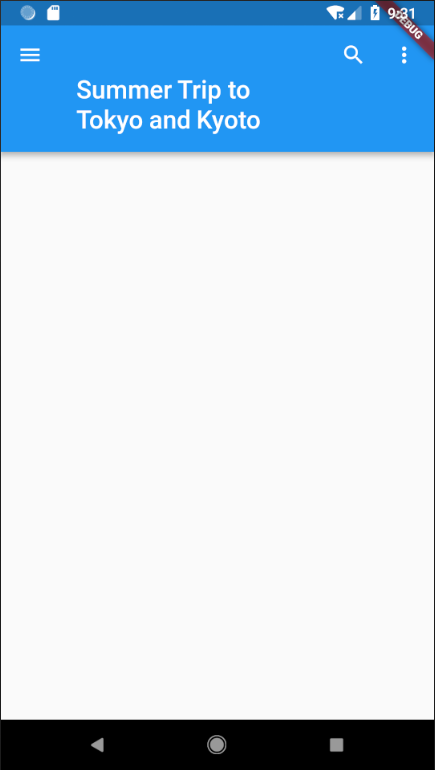
enter image description here

import 'package:flutter/material.dart';
import 'package:cloud_firestore/cloud_firestore.dart';
import 'package:flutter_project/materialSheet.dart';

void main() => runApp(new MyApp());

class MyApp extends StatelessWidget {
  @override
  Widget build(BuildContext context) {
    return new MaterialApp(
      title: 'Flutter Demo',
      theme: new ThemeData(
        primarySwatch: Colors.blue,
      ),
      home: new MyHomePage(),
    );
  }
}

class MyHomePage extends StatefulWidget {
  @override
  _MyHomePageState createState() => new _MyHomePageState();
}

class _MyHomePageState extends State<MyHomePage> {
  @override
  Widget build(BuildContext context) {
    return Scaffold(
      body: CustomScrollView(
        slivers: <Widget>[
          SliverMultilineAppBar(
            title: "Summer Trip to Tokyo and Kyoto",
            leading: IconButton(
              onPressed: () {},
              icon: Icon(Icons.menu),
            ),
            actions: <Widget>[
              IconButton(
                onPressed: () {},
                icon: Icon(Icons.search),
              ),
              IconButton(
                onPressed: () {},
                icon: Icon(Icons.more_vert),
              ),
            ],
          ),
        ],
      ),
    );
  }
}

class SliverMultilineAppBar extends StatelessWidget {
  final String title;
  final Widget leading;
  final List<Widget> actions;

  SliverMultilineAppBar({this.title, this.leading, this.actions});

  @override
  Widget build(BuildContext context) {
    final mediaQuery = MediaQuery.of(context);

    double availableWidth = mediaQuery.size.width - 160;
    if (actions != null) {
      availableWidth -= 32 * actions.length;
    }
    if (leading != null) {
      availableWidth -= 32;
    }
    return SliverAppBar(
      expandedHeight: 120.0,
      forceElevated: true,
      leading: leading,
      actions: actions,
      flexibleSpace: FlexibleSpaceBar(
        title: ConstrainedBox(
          constraints: BoxConstraints(
            maxWidth: availableWidth,
          ),
          child: Text(title, textScaleFactor: .8,),
        ),
      ),
    );
  }
}
Hamill answered 10/6, 2018 at 22:13 Comment(2)
That's a shame, but thanks for letting me know. Seems very odd to not have implemented it yet. Is there a way to find out if they plan to? Or to raise it with the team to request it?Ib
You can look on their github and potentially raised an issue.Maillot
I
9

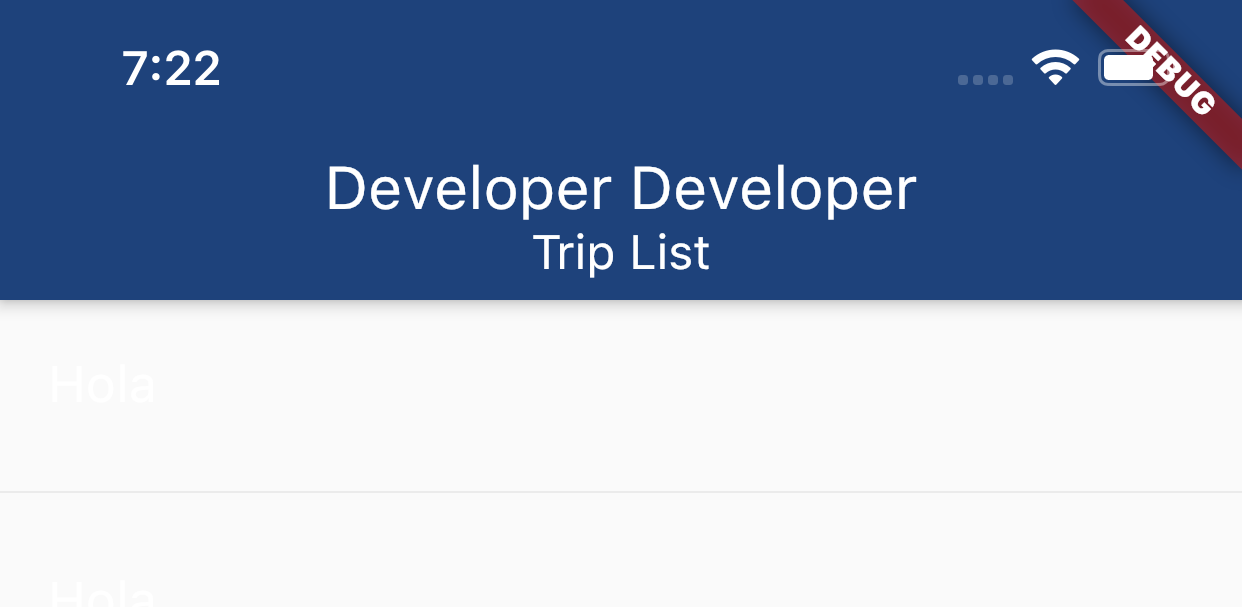
Try below code. This will give multi-line where you can also control the text styling. Use Text instead of RichText if you do not want different style for all the lines.

             AppBar(
                title: RichText(
                  textAlign: TextAlign.center,
                  text: TextSpan(
                      text: "Developer Developer",
                      style: TextStyle(fontSize: 20),
                      children: <TextSpan>[
                        TextSpan(
                          text: '\nTrip List',
                          style: TextStyle(
                            fontSize: 16,
                          ),
                        ),
                      ]
                  ),
                ),
                backgroundColor: MissionGPSTheme.themeBlueColor
            ),

enter image description here

Intramundane answered 14/6, 2020 at 0:18 Comment(2)
This fix does not seem to adapt to a 3 lines textMamba
add one more TextSpan inside children: <TextSpan>. Read up on how RichText & TextSpan work.Intramundane
M
8

You can use RichText:

          SliverAppBar(
        flexibleSpace: FlexibleSpaceBar(
          background: Container(
            color: Colors.indigoAccent,
          ),
          title: RichText(
            text: TextSpan(children: [
              TextSpan(
                text: Constants.homePageTitle,
                style: textTheme.headline,
              ),
              TextSpan(text: "\n"),
              TextSpan(
                text: Constants.homePageSubtitle,
                style: textTheme.subtitle,
              )
            ]),
          ),
          titlePadding: EdgeInsets.only(left: 10, bottom: 20),
        ),
        floating: true,
        backgroundColor: Colors.greenAccent,
        expandedHeight: 150.0,
      ),
Malena answered 2/7, 2019 at 18:41 Comment(0)
C
5

AppBar will let you get close to this, however you do have to indicate the height of the bottom PreferredSize widget, according to your text length, which isn't ideal.

enter image description here

@override
Widget build(BuildContext context) {
  return Scaffold(
    appBar: AppBar(
      backgroundColor: Colors.deepPurple,
      leading: IconButton(icon: Icon(Icons.menu), onPressed: () {}),
      actions: <Widget>[
        IconButton(icon: Icon(Icons.search), onPressed: () {}),
        IconButton(icon: Icon(Icons.more_vert), onPressed: () {}),
      ],
      bottom: PreferredSize(
        child: Padding(
          padding: const EdgeInsets.fromLTRB(80.0, 0.0, 80.0, 16.0),
          child: Text(
            "Summer Trip to Tokyo and Kyoto",
            style: TextStyle(
              color: Colors.white,
              fontSize: 24.0,
            ),
          ),
        ),
        preferredSize: Size(0.0, 80.0),
      ),
    ),
    body: Text("..."),
  );
}
Compressibility answered 26/8, 2018 at 21:23 Comment(1)
I think you need to illustrate more @AyaElsisy :) what problem are you getting?Compressibility
B
4

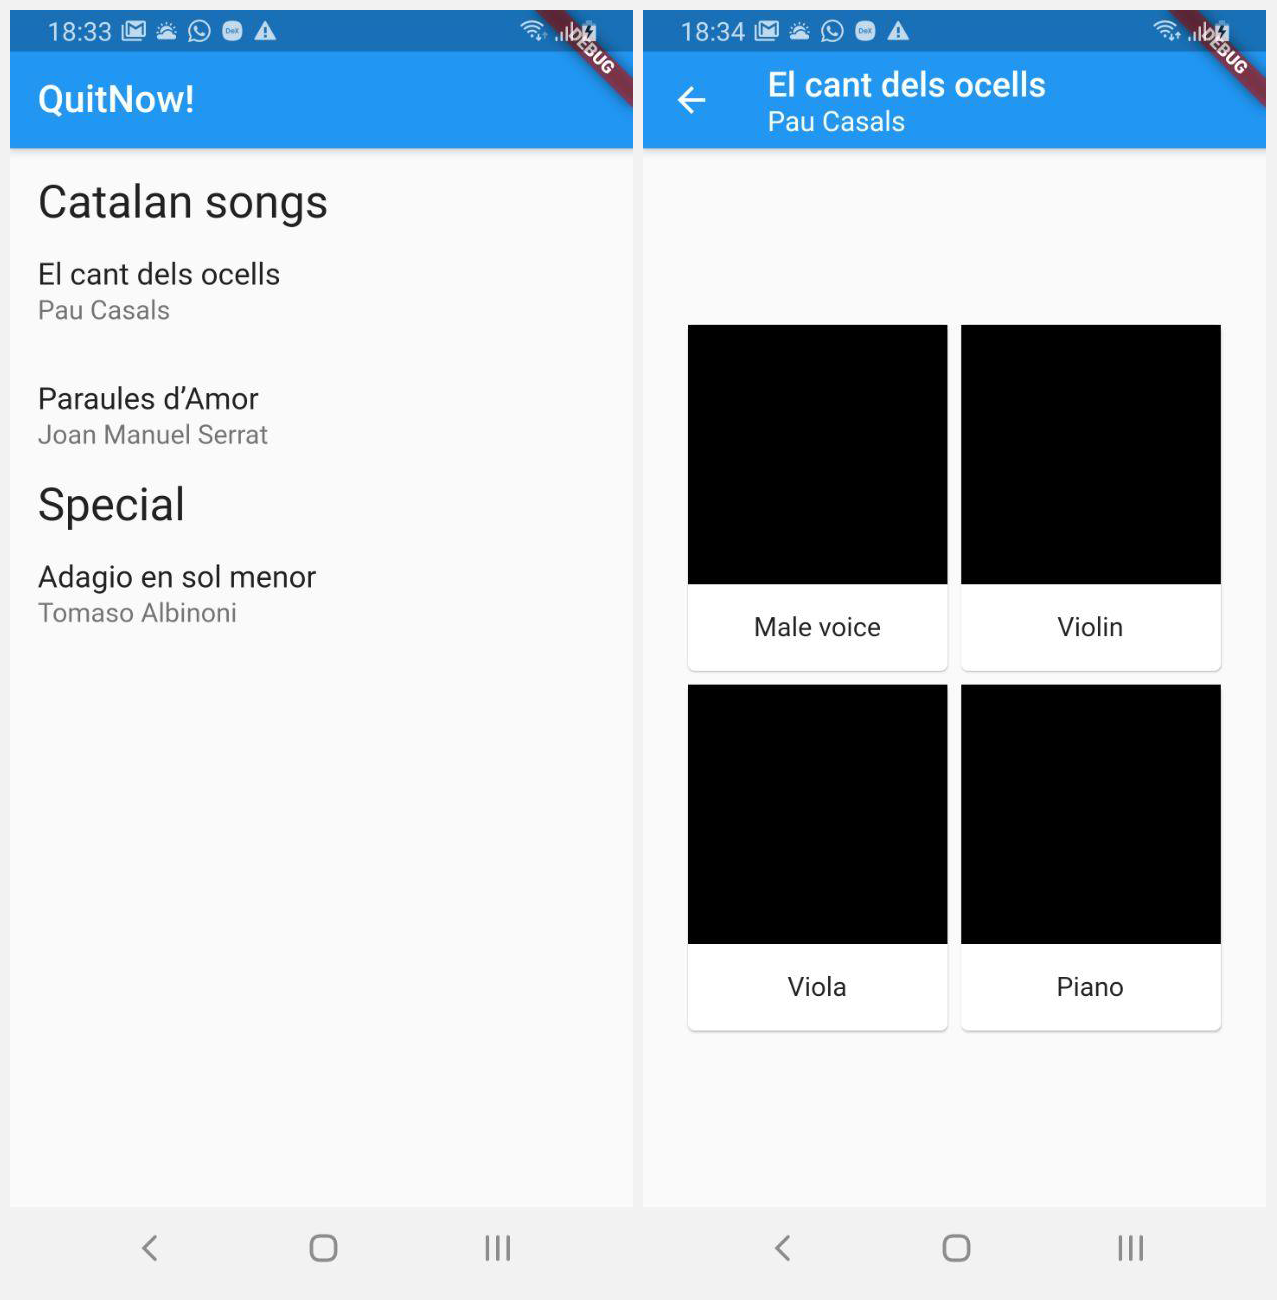
This piece of code will create a custom Scaffold with an AppBar that supports receiving no title, a title, and a title and a subtitle. In case you don't provide a title, it will show a given text (in the example, the name of the app), while in case you set a title and a subtitle, it will use a two lines style with the proper Material Design text style.

An AppBar with one line and two lines

import 'package:flutter/material.dart';

class TwoLinesAppBarScaffold extends StatelessWidget {
  final Widget body;
  final String title;
  final String subtitle;

  TwoLinesAppBarScaffold({this.body, this.title = "QuitNow!", this.subtitle});

  @override
  Widget build(BuildContext context) {
    Widget widget;

    if (subtitle == null) {
      widget = Text(title);
    } else {
      widget = RichText(
        textAlign: TextAlign.start,
        text: TextSpan(
            text: title,
            style: TextStyle(
              fontSize: 20,
              fontWeight: FontWeight.w500,
            ),
            children: <TextSpan>[
              TextSpan(
                text: '\n$subtitle',
                style: TextStyle(
                  fontSize: 16,
                  fontWeight: FontWeight.normal,
                ),
              ),
            ]),
      );
    }

    return Scaffold(
        appBar: AppBar(
          title: widget,
        ),
        body: Center(child: body));
  }
}
Brocky answered 23/10, 2020 at 16:40 Comment(0)
G
2

This can be achieved by replacing the "title" property of AppBar with "flexibleSpace":

  Scaffold(
    appBar: AppBar(
      flexibleSpace: Center(
        child: Column(
          children: [
            Text('Title Line One'),
            Text('Title Line Two'),
          ],
        ),
      ),
    ),
    body: body
  ),

If overflow occurs due to height, just wrap AppBar with a PreferredSize widget and set the height to a higher value than the default one:

  Scaffold(
    appBar: PreferredSize(
      preferredSize: Size.fromHeight(100),
      child: AppBar(...),
    ),
  ),
Gonnella answered 28/4, 2020 at 13:7 Comment(0)
G
1

You could try this in you appbar

AppBar(
        backgroundColor: Colors.green,
        title: Text(
          softWrap: true,
          maxLines: null,
         'This is a big text in appbar')
        )
Grainfield answered 8/12, 2023 at 23:11 Comment(1)
As it’s currently written, your answer is unclear. Please edit to add additional details that will help others understand how this addresses the question asked. You can find more information on how to write good answers in the help center.Taber
E
-1

Found some solution with textPainter to count text height depending on it's style and screen width and pass it to AppBar toolbarHeight

class AppBarHeightCalc {
  String title;
  double width;
  AppBarHeightCalc({
    required this.title,
    required this.width,
  });

double horizontalPadding = 32;
double actionsWidth = 48;
final style = TextStyle(fontSize: 26);

  double calculateHeight() {
    TextPainter textPainter = TextPainter()
      ..text = TextSpan(text: title, style: style)
      ..textDirection = TextDirection.ltr
      ..layout(minWidth: 0, maxWidth: width - horizontalPadding);
    return (textPainter.size.height);
  }

double calculateHeightWithActions() {
    TextPainter textPainter = TextPainter()
      ..text = TextSpan(text: title, style: style)
      ..textDirection = TextDirection.ltr
      ..layout(minWidth: 0, maxWidth: width - actionsWidth - horizontalPadding);
    return (textPainter.size.height);
  }
}

class AppBarExample extends StatelessWidget {
  const AppBarExample({super.key});

  @override
  Widget build(BuildContext context) {
    String title =
        'Lorem ipsum dolor sit amet. 33 nostrum neque qui possimus fugit ex fugiat';
    double screenWidth = MediaQuery.of(context).size.width;
    final appBarHeight = AppBarHeightCalc(title: title, width: screenWidth);
    return Scaffold(
        appBar: AppBar(
          title: Text(
            title,
            maxLines: 3,
          ),
          toolbarHeight: appBarHeight.calculateHeight(),
        ),
        body: Center());
  }
}
Extensor answered 30/12, 2022 at 8:8 Comment(1)
Your answer could be improved with additional supporting information. Please edit to add further details, such as citations or documentation, so that others can confirm that your answer is correct. You can find more information on how to write good answers in the help center.Taber

© 2022 - 2024 — McMap. All rights reserved.