TL;DR
Don't add AWS's MX record to an existing MX record; you need to create a new MX record with a domain that you're not currently using for emails.
Background
I wasn't entirely familiar with MX records and SES, and I already had an MX Record-Set in AWS Route53, I'm using GMAIL (G Suite).
So I followed all the necessary steps - SES-Receive-Inbound-Emails AWS Blog Post - and I still didn't understand why I don't see new emails in my S3 bucket; I could only see AMAZON_SES_SETUP_NOTIFICATION in the bucket.
As already mentioned in previous answers, you must add the AWS's MX record to receive emails, that will eventually be stored in your S3 bucket.
Lesson learned
Having multiple MX records in the same Record-Set is for backup purposes only. If the server is unreachable, it moves on to the next record on the list. Do not expect the email to be received by all the MX records, that will never happen.
Bad Solution
1 ASPMX.L.GOOGLE.COM
5 ALT1.ASPMX.L.GOOGLE.COM
5 ALT2.ASPMX.L.GOOGLE.COM
10 ALT3.ASPMX.L.GOOGLE.COM
10 ALT4.ASPMX.L.GOOGLE.COM
10 inbound-smtp.eu-west-1.amazonaws.com # <-- added this one
I also tried changing the priority of AWS MX from 10 to 1, which is silly, since I still want to receive emails to my mailbox via GMAIL.
Good Solution
Create a new aliased-subdomain and use it for SES.
Here's how:
- Assuming I own
mydomain.com, and my email address is [email protected], I want to use the aliased-subdomain ses.mydomain.com
- Add the aliased domain in your GSuite - Login with Admin account and go to Admin Console > Domains > Follow the steps - Add a domain alias > verify and confirm ownership > Domain Name provider = Other
- Create a TXT record in AWS Route53 according to the guide in the previous step; this will verify that you own the aliased-subdomain
- Back to AWS, Create a new Record-Set in Route53
- Name:  ses.mydomain.com # replace 'ses' if necessary
- Type:  MX
- Value: # this is temporary, we'll change it in the next steps
1 ASPMX.L.GOOGLE.COM
5 ALT1.ASPMX.L.GOOGLE.COM
5 ALT2.ASPMX.L.GOOGLE.COM
10 ALT3.ASPMX.L.GOOGLE.COM
10 ALT4.ASPMX.L.GOOGLE.COM
- Setup SES to S3 - Follow the steps - SES-Receive-Inbound-Emails AWS Blog Post
- Verify the aliased-subdomain ses.mydomain.com
- Verify an email address -
[email protected] - check your regular inbox [email protected] open the email from AWS and verify this email address by clicking the verification link
- Create a rule and add
[email protected] as a recipient
- Edit the previously created MX Record-Set in Route53
- Name:  ses.mydomain.com
- Type:  MX
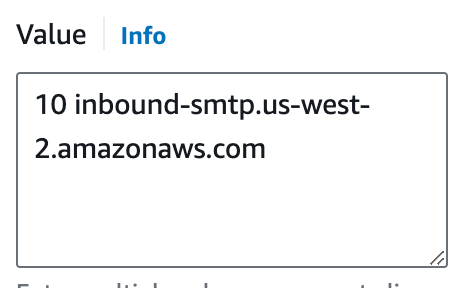
- Value: 10 inbound-smtp.${AWS_REGION}.amazonaws.com  # replace ${AWS_REGION}
- Send an email (from any mailbox) to
[email protected] - you'll see the email in your S3 bucket! Object name is hashed, you need to download and change its extension to .eml
I hope this helps. I was banging my head for a few hours about this one.

