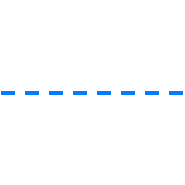
UIView with a Dashed line
Asked Answered
C

9

36

What I have:

enter image description here

To create this line, I basically have an UIView and I do the following:

void setLayerToLineFromAToB(CALayer *layer, CGPoint a, CGPoint b, CGFloat lineWidth)
{
    CGPoint center = { 0.5 * (a.x + b.x), 0.5 * (a.y + b.y) };
    CGFloat length = sqrt((a.x - b.x) * (a.x - b.x) + (a.y - b.y) * (a.y - b.y));
    CGFloat angle = atan2(a.y - b.y, a.x - b.x);

    layer.position = center;
    layer.bounds = (CGRect) { {0, 0}, { length + lineWidth, lineWidth } };
    layer.transform = CATransform3DMakeRotation(angle, 0, 0, 1);
}

Note: This code was found here on stackoverflow, so if someone can give me the reference to it I would appreciate.

What I want:

enter image description here

Ok so the "only" thing I need is to create this pattern on the UIView. I know I am able to do this using Quartz2D (a simple way to do it can be found here). But I want to do it by manipulating the CALayer and not going to to the draw method. Why? Because of the transformation I am making on my UIView, I am not able to draw correctly using the draw method.

Edit 1:

Just to illustrate my problem:

enter image description here

Normally what you have is UIView and then you basically just draw something in it (in this case a simple line). The solution I found to get rid of the "gray" area, was to instead of drawing something, just transform the UIView itself. It work well, if you want a fully filled line, the problem comes when you want a dashed one.

Clarabelle answered 23/8, 2012 at 12:45 Comment(6)
Why not drawing this with Quartz2D on a layer and then transform the layer?!Housebreak
What are you saying, is basically draw it on the draw method and then apply the transform?Clarabelle
Yes thats what i meant... So thats like you draw an "image" and then just transform this "image"Housebreak
@Housebreak check my edit to see if what you are saying does make sense.Clarabelle
Getting rid of grey background? Why not just drawing the line in drawRect and then transforming your uiview will do exact the trick you want to… and this with any shape you did draw on the view beforeHousebreak
Please try this stackoverflow.com/questions/78364285/custom-dashed-border-viewVole
C
24

Note: The code from Prince did really help me out, so I will give him +10 for the tips. But in the end, I add to come with my own code. I will also add some context to it, so it can be useful for future readers


The final code was like this:

-(void)updateLine{

      // Important, otherwise we will be adding multiple sub layers
      if ([[[self layer] sublayers] objectAtIndex:0])
        {
            self.layer.sublayers = nil;
        }

        CAShapeLayer *shapeLayer = [CAShapeLayer layer];
        [shapeLayer setBounds:self.bounds];
        [shapeLayer setPosition:self.center];
        [shapeLayer setFillColor:[[UIColor clearColor] CGColor]];
        [shapeLayer setStrokeColor:[[UIColor blackColor] CGColor]];
        [shapeLayer setLineWidth:3.0f];
        [shapeLayer setLineJoin:kCALineJoinRound];
        [shapeLayer setLineDashPattern:
        [NSArray arrayWithObjects:[NSNumber numberWithInt:10],
        [NSNumber numberWithInt:5],nil]];

        // Setup the path
        CGMutablePathRef path = CGPathCreateMutable();
        CGPathMoveToPoint(path, NULL, beginPoint.center.x, beginPoint.center.y);
        CGPathAddLineToPoint(path, NULL, endPoint.center.x, endPoint.center.y);

        [shapeLayer setPath:path];
        CGPathRelease(path);

        [[self layer] addSublayer:shapeLayer];
}

In my case, the beginPoint and endPoint are movable by the user, by using KVO. So when one of them moves:

-(void)observeValueForKeyPath:(NSString *)keyPath ofObject:(id)object change:(NSDictionary *)change context:(void *)context
{
    if ([keyPath isEqual:@"position"])
    {
        [self updateLine];
    }
}

I did play a lot with Prince's code. I tried on the draw: method, which add a thin line between the dashed line (a bit weird...) and I also tried on initWithFrame:. By itself his code, without any modifications, would give me this kind of errors on the console:

<Error>: CGContextSaveGState: invalid context 0x0
<Error>: CGContextSetLineWidth: invalid context 0x0
<Error>: CGContextSetLineJoin: invalid context 0x0
<Error>: CGContextSetLineCap: invalid context 0x0
<Error>: CGContextSetMiterLimit: invalid context 0x0
<Error>: CGContextSetFlatness: invalid context 0x0
<Error>: CGContextAddPath: invalid context 0x0
<Error>: CGContextDrawPath: invalid context 0x0
<Error>: CGContextRestoreGState: invalid context 0x0
Clarabelle answered 24/8, 2012 at 8:39 Comment(0)
S
42

Check UIBezierPath setLineDash:count:phase: method:

- (void)setLineDash:(const CGFloat *)pattern count:(NSInteger)count phase:(CGFloat)phase` method. 

This allows you to draw dashed lines.

  1. First add a CAShapeLayer. Add it as sublayer to your UIView. It has a path property.
  2. Now make an object of UIBezierPath. Draw the line using setLineDash.

For example:

 UIBezierPath *path = [UIBezierPath bezierPath];
 //draw a line
 [path moveToPoint:yourStartPoint]; //add yourStartPoint here
 [path addLineToPoint:yourEndPoint];// add yourEndPoint here
 [path stroke];

 CGFloat dashPattern[] = {2.0f,6.0f,4.0f,2.0f}; //make your pattern here
 [path setLineDash:dashPattern count:4 phase:3];

 UIColor *fill = [UIColor blueColor];
 shapelayer.strokeStart = 0.0;
 shapelayer.strokeColor = fill.CGColor;
 shapelayer.lineWidth = 5.0;
 shapelayer.lineJoin = kCALineJoinMiter;
 shapelayer.lineDashPattern = [NSArray arrayWithObjects:[NSNumber numberWithInt:10],[NSNumber numberWithInt:7], nil];
 shapelayer.lineDashPhase = 3.0f;
 shapelayer.path = path.CGPath;

Note: This answer provides a hint so you can improvise accordingly to your requirement(s).

Smew answered 23/8, 2012 at 12:50 Comment(4)
Are you doing that before or after applying the transformation?Clarabelle
i m not applying transformation. Jack Boy u have created layer like a line. but its actually u have not drawn lineSmew
I am doing this on the initWithFrame: method of my UIView. I am receiving this kind of errors: <Error>: CGContextSaveGState: invalid context 0x0.Clarabelle
float dashPattern[] = {2,6,4,2} should be CGFloat dashPattern[] = {2,6,4,2}Mahayana
M
32

Dash Line in Swift4 • Xcode 9

Crate a CAShapeLayer & use lineDashPattern

extension UIView {

    func addDashedBorder() {
        //Create a CAShapeLayer
        let shapeLayer = CAShapeLayer()
        shapeLayer.strokeColor = UIColor.red.cgColor
        shapeLayer.lineWidth = 2
        // passing an array with the values [2,3] sets a dash pattern that alternates between a 2-user-space-unit-long painted segment and a 3-user-space-unit-long unpainted segment
        shapeLayer.lineDashPattern = [2,3]

        let path = CGMutablePath()
        path.addLines(between: [CGPoint(x: 0, y: 0),
                                CGPoint(x: self.frame.width, y: 0)])
        shapeLayer.path = path
        layer.addSublayer(shapeLayer)
    }
}

Usage:

dashView.addDashedBorder()

Output:

enter image description here

Metalinguistic answered 17/1, 2018 at 6:56 Comment(2)
how to make the line with full width?Podite
Why don't you use just UIViewMetalinguistic
C
24

Note: The code from Prince did really help me out, so I will give him +10 for the tips. But in the end, I add to come with my own code. I will also add some context to it, so it can be useful for future readers


The final code was like this:

-(void)updateLine{

      // Important, otherwise we will be adding multiple sub layers
      if ([[[self layer] sublayers] objectAtIndex:0])
        {
            self.layer.sublayers = nil;
        }

        CAShapeLayer *shapeLayer = [CAShapeLayer layer];
        [shapeLayer setBounds:self.bounds];
        [shapeLayer setPosition:self.center];
        [shapeLayer setFillColor:[[UIColor clearColor] CGColor]];
        [shapeLayer setStrokeColor:[[UIColor blackColor] CGColor]];
        [shapeLayer setLineWidth:3.0f];
        [shapeLayer setLineJoin:kCALineJoinRound];
        [shapeLayer setLineDashPattern:
        [NSArray arrayWithObjects:[NSNumber numberWithInt:10],
        [NSNumber numberWithInt:5],nil]];

        // Setup the path
        CGMutablePathRef path = CGPathCreateMutable();
        CGPathMoveToPoint(path, NULL, beginPoint.center.x, beginPoint.center.y);
        CGPathAddLineToPoint(path, NULL, endPoint.center.x, endPoint.center.y);

        [shapeLayer setPath:path];
        CGPathRelease(path);

        [[self layer] addSublayer:shapeLayer];
}

In my case, the beginPoint and endPoint are movable by the user, by using KVO. So when one of them moves:

-(void)observeValueForKeyPath:(NSString *)keyPath ofObject:(id)object change:(NSDictionary *)change context:(void *)context
{
    if ([keyPath isEqual:@"position"])
    {
        [self updateLine];
    }
}

I did play a lot with Prince's code. I tried on the draw: method, which add a thin line between the dashed line (a bit weird...) and I also tried on initWithFrame:. By itself his code, without any modifications, would give me this kind of errors on the console:

<Error>: CGContextSaveGState: invalid context 0x0
<Error>: CGContextSetLineWidth: invalid context 0x0
<Error>: CGContextSetLineJoin: invalid context 0x0
<Error>: CGContextSetLineCap: invalid context 0x0
<Error>: CGContextSetMiterLimit: invalid context 0x0
<Error>: CGContextSetFlatness: invalid context 0x0
<Error>: CGContextAddPath: invalid context 0x0
<Error>: CGContextDrawPath: invalid context 0x0
<Error>: CGContextRestoreGState: invalid context 0x0
Clarabelle answered 24/8, 2012 at 8:39 Comment(0)
S
15

Swift 2.2

dropping this in here to save others time..

extension UIView {
    func addDashedLine(color: UIColor = UIColor.lightGrayColor()) {
        layer.sublayers?.filter({ $0.name == "DashedTopLine" }).map({ $0.removeFromSuperlayer() })
        self.backgroundColor = UIColor.clearColor()
        let cgColor = color.CGColor

        let shapeLayer: CAShapeLayer = CAShapeLayer()
        let frameSize = self.frame.size
        let shapeRect = CGRect(x: 0, y: 0, width: frameSize.width, height: frameSize.height)

        shapeLayer.name = "DashedTopLine"
        shapeLayer.bounds = shapeRect
        shapeLayer.position = CGPoint(x: frameSize.width / 2, y: frameSize.height / 2)
        shapeLayer.fillColor = UIColor.clearColor().CGColor
        shapeLayer.strokeColor = cgColor
        shapeLayer.lineWidth = 1
        shapeLayer.lineJoin = kCALineJoinRound
        shapeLayer.lineDashPattern = [4, 4]

        let path: CGMutablePathRef = CGPathCreateMutable()
        CGPathMoveToPoint(path, nil, 0, 0)
        CGPathAddLineToPoint(path, nil, self.frame.width, 0)
        shapeLayer.path = path

        self.layer.addSublayer(shapeLayer)
    }
}
Silkaline answered 5/7, 2016 at 1:54 Comment(1)
Just a hint: you can use .forEach() instead of map, then the compiler doesn't give a warning of unused result of map.Lesbos
B
15

Here is Swift 3 version of Alexandre G's answer https://mcmap.net/q/417679/-uiview-with-a-dashed-line

extension UIView {

        func addDashedLine(color: UIColor = .lightGray) {
            layer.sublayers?.filter({ $0.name == "DashedTopLine" }).map({ $0.removeFromSuperlayer() })
            backgroundColor = .clear

            let shapeLayer = CAShapeLayer()
            shapeLayer.name = "DashedTopLine"
            shapeLayer.bounds = bounds
            shapeLayer.position = CGPoint(x: frame.width / 2, y: frame.height / 2)
            shapeLayer.fillColor = UIColor.clear.cgColor
            shapeLayer.strokeColor = color.cgColor
            shapeLayer.lineWidth = 1
            shapeLayer.lineJoin = kCALineJoinRound
            shapeLayer.lineDashPattern = [4, 4]

            let path = CGMutablePath()
            path.move(to: CGPoint.zero)
            path.addLine(to: CGPoint(x: frame.width, y: 0))
            shapeLayer.path = path

            layer.addSublayer(shapeLayer)
        }
}
Baier answered 5/2, 2017 at 11:11 Comment(0)
A
8

The accepted answer has a coordinate problem. The line will be drawn some distance below. And I cannot figure out why and how much distance it increases on Y coordinate.

There's a way to draw a dashed line with correct coordinate:

-(void)drawRect:(CGRect)rect
{
     CGContextBeginPath(cx);
     CGContextRef cx = UIGraphicsGetCurrentContext();
     CGContextSetLineWidth(cx, _thickness);
     CGContextSetStrokeColorWithColor(cx, _color.CGColor);

     CGFloat dash[] = {_dashedLength,_dashedGap};
     CGContextSetLineDash(cx, 0, dash, 2); // nb "2" == ra count
//    CGContextSetLineCap(cx, kCGLineCapRound);

     CGContextMoveToPoint(cx, 0, _thickness);
     CGContextAddLineToPoint(cx, self.bounds.size.width, _thickness);
     CGContextStrokePath(cx);
     CGContextClosePath(cx);
}

This answer is from Draw dotted (not dashed!) line, with IBDesignable in 2017. DON'T DON'T DON'T forget to set the background color as white when you want a black dashed line!! By default the view has a black background color, and the line color is also black, so I thought it was a solid line. It cost me half a day to find out. T_T

Anchoress answered 25/6, 2015 at 3:17 Comment(2)
This might be too late for you but you can check my comment on @Shaheen Ghiassy answerAlfilaria
Cost me half an hour T_T, thanks to your warning, it did not cost me more.Dissolute
V
6

First all the credit goes to RuiAAPeres and Prince, I'm just encapsulating their answers into a UIView object that others can drop into their projects and use

#import <UIKit/UIKit.h>

/**
 *  Simple UIView for a dotted line
 */
@interface H3DottedLine : UIView

/**
 *  Set the line's thickness
 */
@property (nonatomic, assign) CGFloat thickness;

/**
 *  Set the line's color
 */
@property (nonatomic, copy) UIColor *color;

/**
 *  Set the length of the dash
 */
@property (nonatomic, assign) CGFloat dashedLength;

/**
 *  Set the gap between dashes
 */
@property (nonatomic, assign) CGFloat dashedGap;

@end


@implementation H3DottedLine

#pragma mark - Object Lifecycle

- (instancetype)init {
    self = [super init];

    if (self) {
        // Set Default Values
        _thickness = 1.0f;
        _color = [UIColor whiteColor];
        _dashedGap = 1.0f;
        _dashedLength = 5.0f;
    }

    return self;
}

#pragma mark - View Lifecycle

- (void)layoutSubviews {
    // Note, this object draws a straight line. If you wanted the line at an angle you simply need to adjust the start and/or end point here.
    [self updateLineStartingAt:self.frame.origin andEndPoint:CGPointMake(self.frame.origin.x+self.frame.size.width, self.frame.origin.y)];
}

#pragma mark - Setters

- (void)setThickness:(CGFloat)thickness {
    _thickness = thickness;
    [self setNeedsLayout];
}

- (void)setColor:(UIColor *)color {
    _color = [color copy];
    [self setNeedsLayout];
}

- (void)setDashedGap:(CGFloat)dashedGap {
    _dashedGap = dashedGap;
    [self setNeedsLayout];
}

- (void)setDashedLength:(CGFloat)dashedLength {
    _dashedLength = dashedLength;
    [self setNeedsLayout];
}

#pragma mark - Draw Methods

-(void)updateLineStartingAt:(CGPoint)beginPoint andEndPoint:(CGPoint)endPoint {

    // Important, otherwise we will be adding multiple sub layers
    if ([[[self layer] sublayers] objectAtIndex:0]) {
        self.layer.sublayers = nil;
    }

    CAShapeLayer *shapeLayer = [CAShapeLayer layer];
    [shapeLayer setBounds:self.bounds];
    [shapeLayer setPosition:self.center];
    [shapeLayer setFillColor:[UIColor clearColor].CGColor];
    [shapeLayer setStrokeColor:self.color.CGColor];
    [shapeLayer setLineWidth:self.thickness];
    [shapeLayer setLineJoin:kCALineJoinRound];
    [shapeLayer setLineDashPattern:@[@(self.dashedLength), @(self.dashedGap)]];

    // Setup the path
    CGMutablePathRef path = CGPathCreateMutable();
    CGPathMoveToPoint(path, NULL, beginPoint.x, beginPoint.y);
    CGPathAddLineToPoint(path, NULL, endPoint.x, endPoint.y);

    [shapeLayer setPath:path];
    CGPathRelease(path);

    [[self layer] addSublayer:shapeLayer];
}

@end
Vikki answered 2/3, 2015 at 0:33 Comment(1)
For people who can't make this class work. Try changing all instances of self.frame to self.bounds and set the [shapeLayer setPosition:self.center] to [shapeLayer setPosition:CGPointZero]Alfilaria
C
6

Update Swift 5 & UIBezierPath

For those working with UIBezierPath instead of CAShapeLayer, here is how to achieve it

class MyView: UIView {

    override func draw(_ rect: CGRect) {

        let path = UIBezierPath()
        // >> define the pattern & apply it 
        let dashPattern: [CGFloat] = [4.0, 4.0]
        path.setLineDash(dashPattern, count: dashPattern.count, phase: 0)
        // <<
        path.lineWidth = 1
        path.move(to: CGPoint(x: 0, y: 0))
        path.addLine(to: CGPoint(x: 100, y: 100))
        path.stroke()

    }
}

As said many times in this thread, you can play with the pattern and the phase to achieve a complex dotted line.

Hope this helps

Crampton answered 13/6, 2019 at 2:17 Comment(0)
S
4

Swift 5 & Using extension :

Using the following code, you can draw a dashed line in the middle of your view.

extension UIView {
    enum dashedOrientation {
        case horizontal
        case vertical
    }
    
    func makeDashedBorderLine(color: UIColor, strokeLength: NSNumber, gapLength: NSNumber, width: CGFloat, orientation: dashedOrientation) {
        let path = CGMutablePath()
        let shapeLayer = CAShapeLayer()
        shapeLayer.lineWidth = width
        shapeLayer.strokeColor = color.cgColor
        shapeLayer.lineDashPattern = [strokeLength, gapLength]
        if orientation == .vertical {
            path.addLines(between: [CGPoint(x: bounds.midX, y: bounds.minY),
                                    CGPoint(x: bounds.midX, y: bounds.maxY)])
        } else if orientation == .horizontal {
            path.addLines(between: [CGPoint(x: bounds.minX, y: bounds.midY),
                                    CGPoint(x: bounds.maxX, y: bounds.midY)])
        }
        shapeLayer.path = path
        layer.addSublayer(shapeLayer)
    }
}

Calling method :

vu1.makeDashedBorderLine(color: .black, strokeLength: 7, gapLength: 5, width: 2, orientation: .horizontal)

Horizontal Vertical

Sochi answered 5/2, 2022 at 12:49 Comment(0)

© 2022 - 2024 — McMap. All rights reserved.