Play Raspberry Pi h264 stream in C# app
Asked Answered
E

2

7

I have a Raspberry Pi board with dedicated camera that records video only in h264. I am looking for the best method to stream and play recorded video in real-time (as in, less than 1 sec delay) in c# windows forms app. The additional requirement is that such stream can be easily processed before displaying, for example for searching for objects on the image.

Stuff I tried:

- VLC server on raspi and VLC control in c# forms app <- simple solution, with RTSP, but has a serious flaw, which is a ~3sec delay in image displayed. I couldn't fix it with buffor size/options etc.

- creating a socket on raspi with nc, receiving raw h264 data in c# and passing it to mplayer frontend <- If I simply start raspivid | nc and on the laptop nc | mplayer, i get exactly the results i want, the video i get is pretty much realtime, but the problem arises when i try to create mplayer frontend in c# and simulate the nc.exe. Maybe I'm passing the h264 data wrong (simply write them to stdin) or maybe something else.

- using https://github.com/cisco/openh264 <- I compiled everything, but i can't even get to decode sample vid.h264 i recorded on raspi with h264dec.exe, not to mention using it in c#.

h264dec.exe vid.h264 out.yuv

This produces 0bytes out.yuv file, while:

h264dec.exe  vid.h264

Gives me error message: "No input file specified in configuration file."

- ffmpeg <- I implemented ffplay.exe playback in c# app but the lack of easy method to take screencaps etc. discouraged me to further investigate and develop.

I'm not even sure whether I'm properly approaching the subject, so I'd be really thankful for every piece of advice I can get.

EDIT Here is my 'working' solution I am trying to implement in c#

raspivid --width 400 --height 300 -t 9999999 --framerate 25 --output - | nc -l 5884

nc ip_addr 5884 | mplayer -nosound -fps 100 -demuxer +h264es -cache 1024 -

The key here is FPS 100, becuase then mplayer skips lag and plays the video it immediately receives with normal speed. The issue here is that I don't know how to pass video data from socket into mplayer via c#, because I guess it is not done via stdin (already tried that).

Environment answered 28/6, 2014 at 14:15 Comment(0)
E
4

Ok, so actually I managed to solve this:

Like I said earlier -fps 120 option is there to make the player skip what's in the buffor and play stream as soon as it receives it. PanelId is a handle of a panel in which mplayer is nested.

class Mplayer
{
    Process mplayer;

    public Mplayer(string path, string pipeName, int panelId)
    {
        String args = "";
        mplayer = new Process();
        mplayer.StartInfo.UseShellExecute = false;
        mplayer.StartInfo.RedirectStandardInput = true;
        mplayer.StartInfo.FileName = path;
        args = @"\\.\pipe\" + pipeName + " -demuxer +h264es -fps 120 -nosound -cache 512";
        args += " -nofs -noquiet -identify -slave ";
        args += " -nomouseinput -sub-fuzziness 1 ";
        args += " -vo direct3d, -ao dsound  -wid ";
        args += panelId;
        mplayer.StartInfo.Arguments = args;
    }

    public void Start()
    {
        mplayer.Start();
    }

    public void End()
    {
        mplayer.Kill();
    }
}

The background worker reading stuff from socket:

    private void backgroundWorker1_DoWork(object sender, DoWorkEventArgs e)
    {
        try
        {
            pipeServ.WaitForConnection(); //opcjonalne?
            StreamWriter sw = new StreamWriter(pipeServ);
            sw.AutoFlush = true;

            tcpCamera = new TcpClient();
            tcpCamera.Connect(ipAddress, camPort);
            NetworkStream camStream = tcpCamera.GetStream();

            int read = 0;
            byte[] bytes = new byte[tcpCamera.ReceiveBufferSize];
            while (tcpCamera.Connected)
            {
                read = camStream.Read(bytes, 0, tcpCamera.ReceiveBufferSize);
                if (read > 0)
                    pipeServ.Write(bytes, 0, read);
            }
        }
        catch (IOException ex)
        {
            //Broken pipe - result of Mplayer exit
            //MessageBox.Show(ex.Message);
        }
        catch (Exception ex)
        {
            MessageBox.Show(ex.Message);
        }
    }

The script running on the RaspberryPi. Portnumber is the number of the port rasp is listening on.

#!/bin/bash

raspivid --width 1280 --height 720 -t 9999999 --framerate 25 --output - | nc -l PORTNUMBER
Environment answered 2/7, 2014 at 18:48 Comment(0)
B
0

I solved it without using NamedPipes. Here is how:

Note: This solution only works on Linux.

First create a bash script VideoStreamRecv.bash. $1 is the argument for WindowID, we'll pass our WinForm Panel ID to this bash script.

#!/bin/bash -e
nc 127.0.0.1 5000 | mplayer -nosound -fps 120 -demuxer h264es -cache 1024 -wid $1 -

Note: Write IP of the Raspberry Pi to which the camera is connected in place of 127.0.0.1.

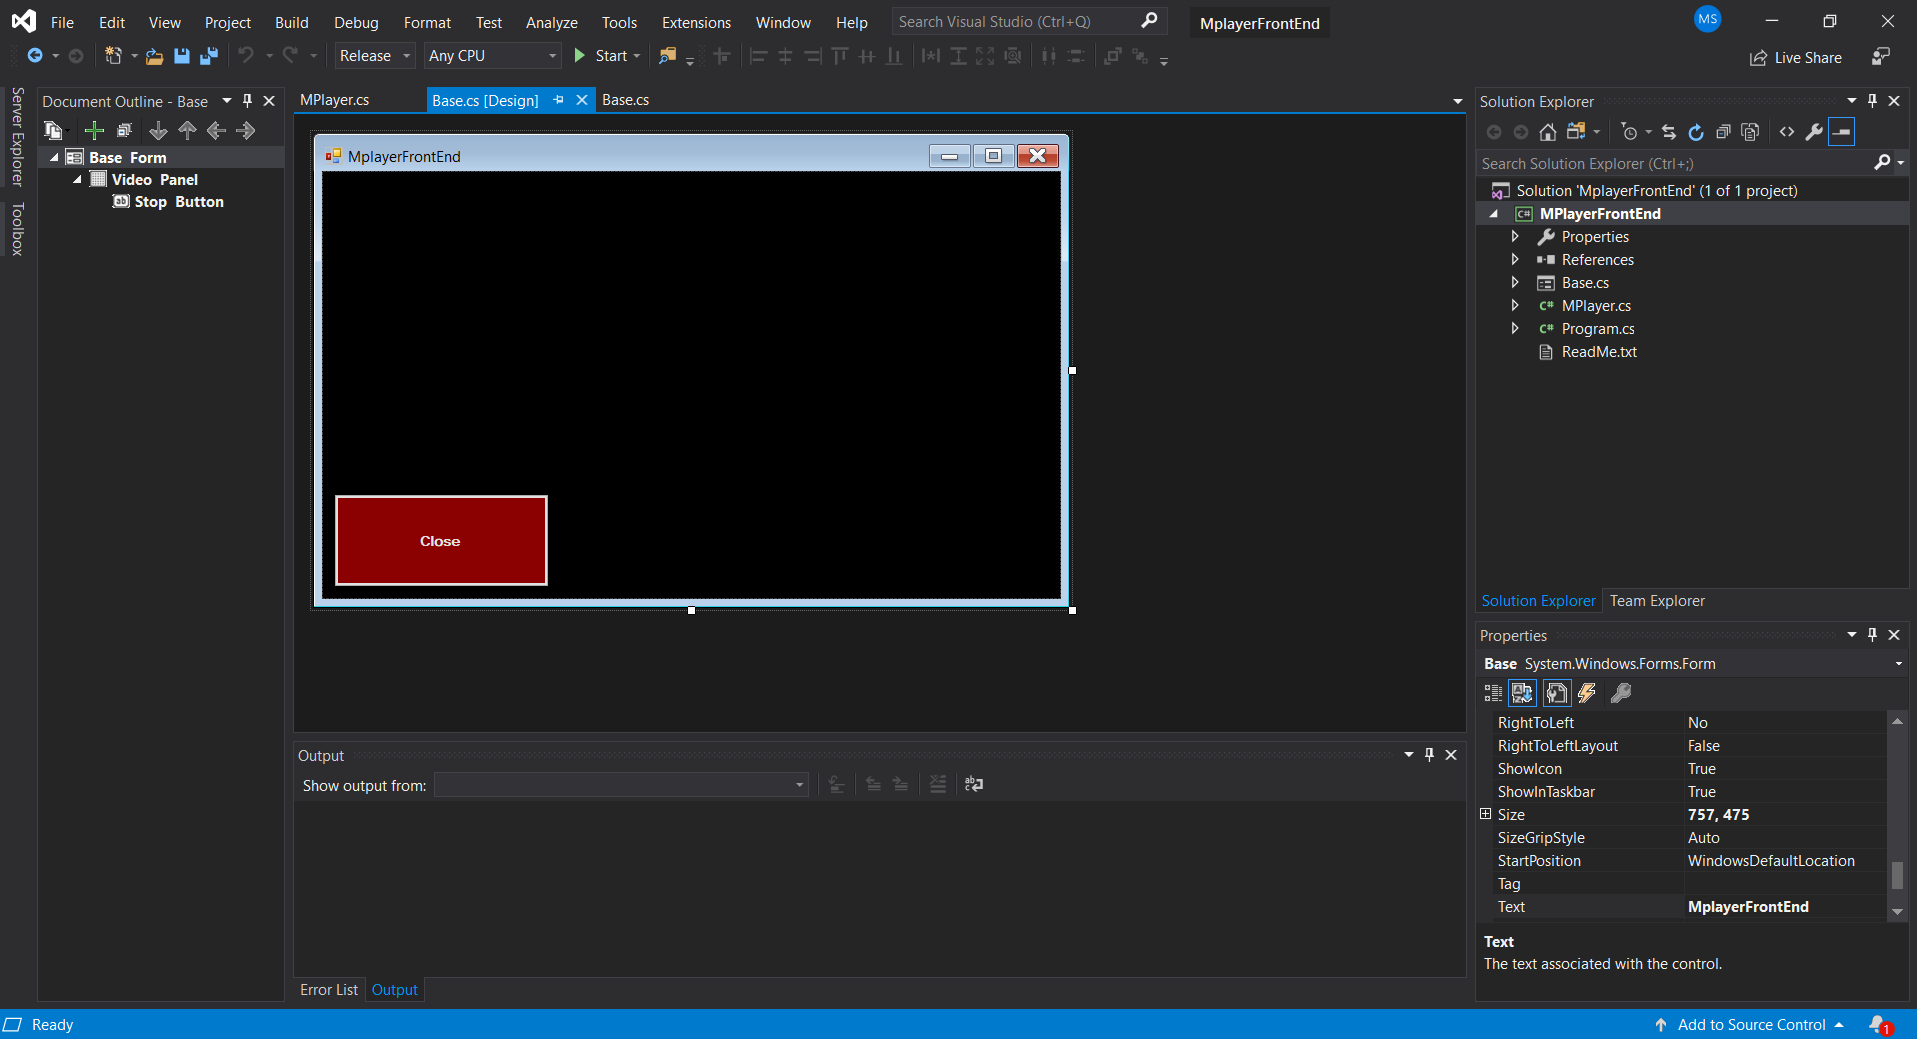
Create your C# project. I Created a simple Windows Forms App project in Visual Studio. Here is the overall look.

enter image description here

Here are the classes:

Base.cs

public partial class Base : Form
{
    private MPlayer Player;
    private StreamWriter PlayerInput;
    public Base()
    {
        InitializeComponent();
    }

    private void Base_Load(object sender, EventArgs e)
    {
        Player = new MPlayer((int)Video.Handle);
        Player.Start();
    }

    private void Stop_Click(object sender, EventArgs e)
    {
        Player.End();
    }
}

MPlayer.cs

It is like @CoreMeltdown but here We are calling bash script instead and to close the mplayer sub-process we are calling pkill in End function.

class MPlayer
{
    Process mplayer;

    public MPlayer(int PanelID)
    {
        mplayer = new Process();
        mplayer.StartInfo.UseShellExecute = false;
        mplayer.StartInfo.RedirectStandardInput = true;
        mplayer.StartInfo.FileName = "VideoStreamRecv.bash";
        mplayer.StartInfo.Arguments = PanelID.ToString();
    }

    public void Start()
    {
        mplayer.Start();
    }

    public void End()
    {
        mplayer.Kill();
        Process.Start("pkill mplayer");
    }
}

Compile the project and copy all binaries and the VideoStreamRecv.bash to the same directory as binaries into Raspberry Pi.

Install mono for Raspberry Pi using these commands:

sudo apt-key adv --keyserver hkp://keyserver.ubuntu.com:80 --recv-keys 3FA7E0328081BFF6A14DA29AA6A19B38D3D831EF
echo "deb http://download.mono-project.com/repo/debian raspbianstretch main" | sudo tee /etc/apt/sources.list.d/mono-official.list
sudo apt-get update
sudo apt-get install mono-devel --yes --allow-unauthenticated

Start the camera stream on Raspberry Pi with which camera is attached using this command (same as @CoreMeltdown).

raspivid --width 400 --height 300 -t 9999999 --framerate 25 --output - | nc -l 5000

On receiver Raspberry Pi (the one with the compiled binaries), open terminal, go to dir with binaries and execute:

mono MplayerFrontEnd.exe # MplayerFrontEnd is the name of my project, use your own name here.

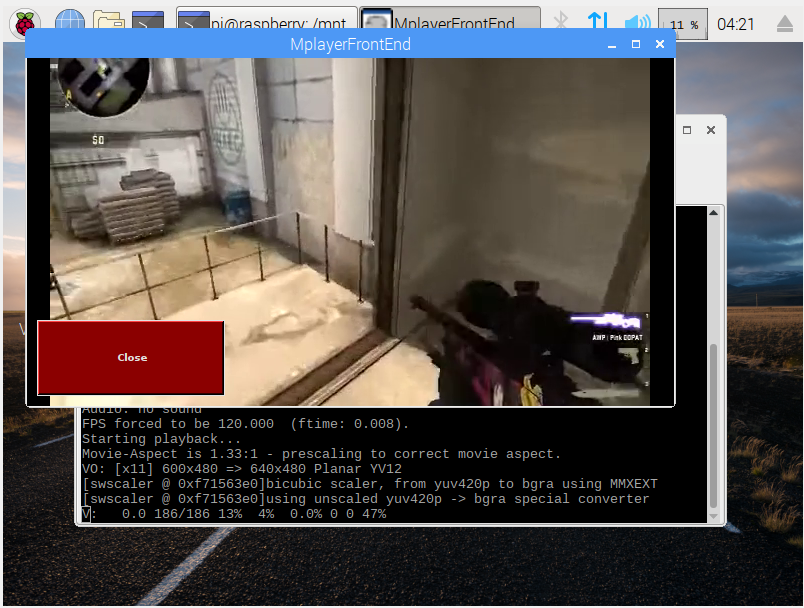
Here is how it looks like:

enter image description here

Happy Dev :D

Blurt answered 4/9, 2019 at 23:24 Comment(0)

© 2022 - 2024 — McMap. All rights reserved.