How to clip the BackdropFilter with smooth edges?
Asked Answered
C

2

9

I wanted to apply a BackdropFilter over an image in Flutter. So, I used the following way to apply the filter as given in the Flutter docs.

import 'dart:ui';
import 'package:flutter/material.dart';

void main() {
   runApp(
    MaterialApp(
      debugShowCheckedModeBanner: false,
      home: Scaffold(
        body: MyApp(),
      ),
    ),
  );
}

class MyApp extends StatelessWidget {
  @override
  Widget build(BuildContext context) {
    return Scaffold(
      body: Center(
        child: Stack(
          alignment: Alignment.bottomCenter,
          children: <Widget>[
            Container(
              height: 500,
              child: Image.network('https://encrypted-tbn0.gstatic.com/images?q=tbn%3AANd9GcQlXYdeEKhFq34sh8-0ZKC1uqCcVGgOzdW_ZRAqCBkWxG-oeCB1'),
            ),
            Positioned(
              top: 300,
              bottom: 0,
              left: 0,
              right: 0,
              child: ClipRect(
                child: BackdropFilter(
                  filter: ImageFilter.blur(sigmaX: 2, sigmaY: 10),
                  child: Container(
                    color: Colors.black.withOpacity(0),
                  ),
                ),
              ),
            ),
          ]
        ),
      ),
    );
  }
}

It produced the following output: Output of my code

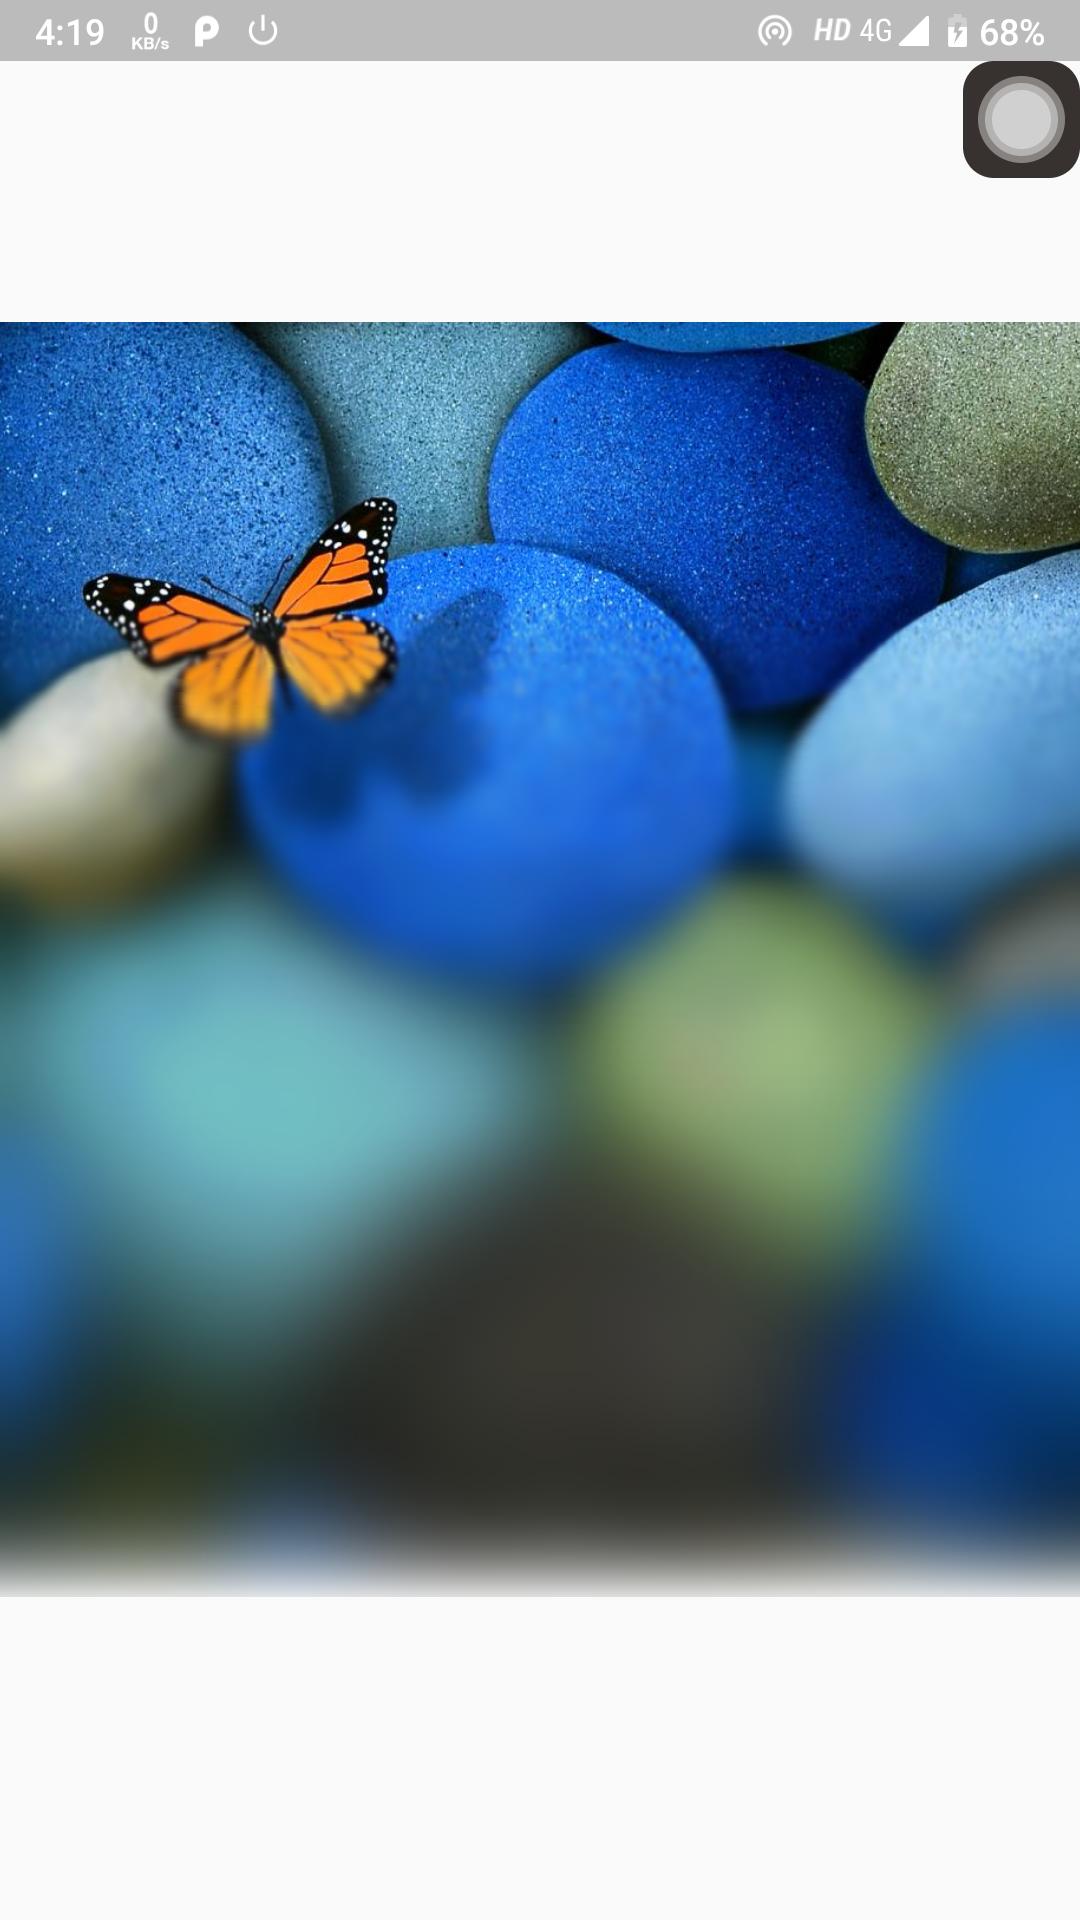
I am getting a hard edge between the BackDropFilter and the Image. Although, I want a smooth edge between them.

How can I achieve something like this?

Catherine answered 15/11, 2019 at 13:25 Comment(1)
I made some experiments, but not even the original code from the YouTube video from the Flutter team works as they show on the video. The Positioned Widget doesn't work as they show and Clipping it gives me the same results as you got.Frost
E
8

I was able to achieve it but it is kind of way out as there is no way to directly implement it as of now. Make this function for creating the effect. This function will recieve a list of widgets that you want to blur.

List<Widget> buildBlurredImage(List<Widget> l) {
    List<Widget> list = [];
    list.addAll(l);
    double sigmaX = 0;
    double sigmaY = 0.1;
    for (int i = 100; i < 350; i += 5) {
     // 100 is the starting height of blur
     // 350 is the ending height of blur
      list.add(Positioned(
        top: i.toDouble(),
        bottom: 0,
        left: 0,
        right: 0,
        child: ClipRect(
          child: BackdropFilter(
            filter: ImageFilter.blur(
              sigmaX: sigmaX,
              sigmaY: sigmaY,
            ),
            child: Container(
              color: Colors.black.withOpacity(0),
            ),
          ),
        ),
      ));
      sigmaX += 0.1;
      sigmaY += 0.1;
    }
    return list;
  }

then inside your widget class inside stack use the function like this

@override
  Widget build(BuildContext context) {
    return Scaffold(
      body: Center(
        child: Stack(
          alignment: Alignment.bottomCenter,
          // children: <Widget>[],
          children: buildBlurredImage([
            Container(
              height: 500,
              child: Image.network(
                'https://www.thewowstyle.com/wp-content/uploads/2015/02/Beautiful-Wallpapers-14.jpg',
                fit: BoxFit.cover,
              ),
            ),
          ]),
        ),
      ),
    );
  }

enter image description here

Your final Widget class will look like this

class MyApp extends StatelessWidget {
  List<Widget> buildBlurredImage(List<Widget> l) {
    List<Widget> list = [];
    list.addAll(l);
    double sigmaX = 0;
    double sigmaY = 0.1;
    for (int i = 100; i < 350; i += 5) {
      // 100 is the starting height of blur
      // 350 is the ending height of blur
      list.add(Positioned(
        top: i.toDouble(),
        bottom: 0,
        left: 0,
        right: 0,
        child: ClipRect(
          child: BackdropFilter(
            filter: ImageFilter.blur(
              sigmaX: sigmaX,
              sigmaY: sigmaY,
            ),
            child: Container(
              color: Colors.black.withOpacity(0),
            ),
          ),
        ),
      ));
      sigmaX += 0.1;
      sigmaY += 0.1;
    }
    return list;
  }

  @override
  Widget build(BuildContext context) {
    return Scaffold(
      body: Center(
        child: Stack(
          alignment: Alignment.bottomCenter,
          // children: <Widget>[],
          children: buildBlurredImage([
            Container(
              height: 500,
              child: Image.network(
                'https://www.thewowstyle.com/wp-content/uploads/2015/02/Beautiful-Wallpapers-14.jpg',
                fit: BoxFit.cover,
              ),
            ),
          ]),
        ),
      ),
    );
  }
}
Empedocles answered 8/1, 2020 at 11:0 Comment(0)
F
3

The best approach for me would be to used a ShaderMask above the BackdropFilter.

Unfortunately that stop working due to a change in the engine: link

I created a issue on flutter, and I hope they solve the bug soon.

Familiar answered 5/1, 2020 at 16:13 Comment(0)

© 2022 - 2024 — McMap. All rights reserved.