Using AutoLayout to stack within two Columns of varying Heights
Asked Answered
C

3

11

Targetting iOS 8.1

I am using AutoLayout to lay out a number of Labels in a TableCell. Some of those Labels are optional and some can wrap their Text. They are split across two "Columns", these columns are simply two UIViews in the TableCell's ContentView. My constraints are applied programatically.

SECOND UPDATE

Without SwiftArchitect's answer below I would not have solved this and have accepted his answer. However because mine is all in code, in a custom tablecell, I have also added a separate answer below

UPDATE

In an attempt to stop the labels from stretching to a size larger than they needed to be I had previously set the SetContentHuggingPriority and SetContentCompressionResistancePriority to 1000 as I belived this was the equivalent of saying "I want the Label to hug its content to its exact height and I do not want it to ever be compressed vertically" This request was clearly not being complied with by AutoLayout as you can see in the Red and Pink examples below.

this.notesLabel.SetContentHuggingPriority(1000, UILayoutConstraintAxis.Vertical);
this.notesLabel.SetContentCompressionResistancePriority(1000, UILayoutConstraintAxis.Vertical);

I removed the setting of these priorities and the labels are no longer being squashed which was my original issue. Of course now certain labels are stretched beyond the height they need to be.

  1. Why does removing the Hugging and Compression priorities fix my issue?
  2. How can I get the text in the red box (red box not part of the cell added later) to not expand without going back to my previous issue?

enter image description here

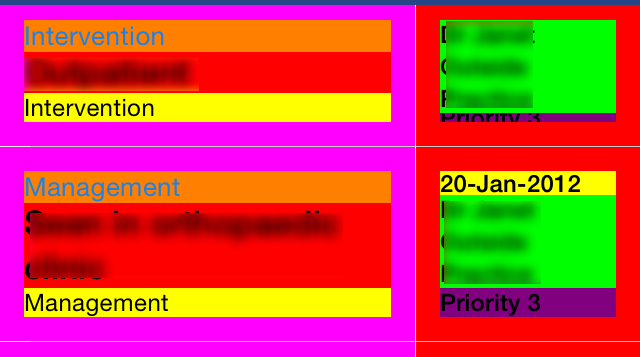
Here are a couple of screenshots of what it did look like when the Compression and Hugging priorities where set. The background colours are for debugging

enter image description here

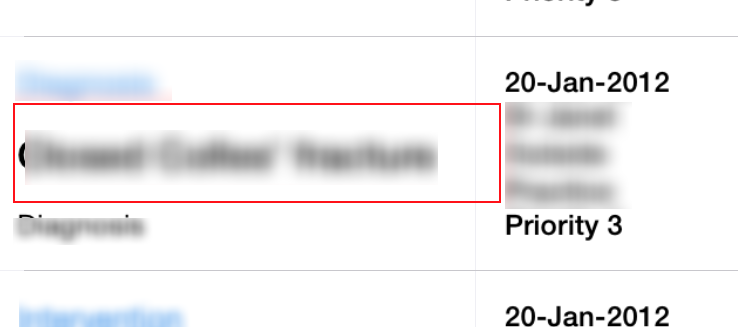
The general problem was that the Containing View's (colored purple and red) were sizing themselves to the smaller of the two. As you can see in the top one "Priority 3" is being cut because the left column container doesn't need to be any higher.

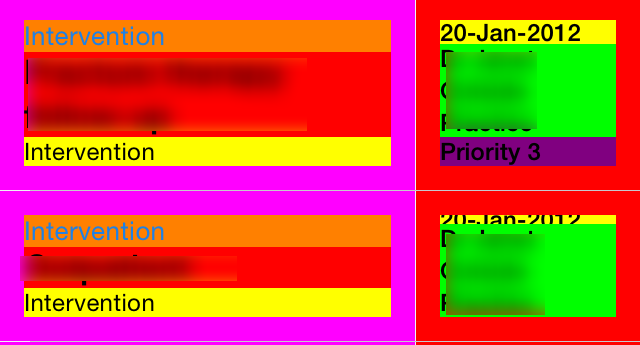
In this next example there is no Priority label but the EventDate is being squashed.

enter image description here

Coimbatore answered 27/7, 2015 at 16:32 Comment(1)
What are the constraints on your container views? Even if you have 1000 set, and the outer view has decided it needs to be smaller, something has to give! Capturing the view hierarchy and looking at the runtime constraints may give you the information that you need.Bashee
G
6

The following answer has been written and tested. It works properly on iPhone & iPad, portrait & landscape. The tallest column wins, and the other one just takes the space it needs. It can even be modified to vertically center objects if need be. It addresses the vertically clipped label concerns, as well as dynamic scaling.

enter image description here

Preliminary advice

  • Use a Storyboard if you can. You can test all your constraints visually with a state-of-the-art GUI.
  • Do not tinker with hugging, compression, or even UILabel height: let each label take the space it needs vertically, and only add top and side anchors
  • Use extra views as containers to define the width of each column. Use multiplier to get, say 2 thirds and 1 third.
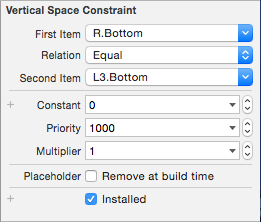
  • Let these views calculate their ideal height by adding a single height constraint to the bottom of the lowest label (leftColumn.bottom Equal lowestLeftLabel.bottom)
  • Do not add or remove views dynamically ; rather, hide them so that they preserve the associated constraints.

Solution Description

For simplicity, I have created 2 subviews, 1 for each column, and positioned them side by side. They are anchored on top/left and top/right, their width is calculated, and their height is derived from their respective content(*).

The left and right subviews have a 1/2 multiplier, to which I added a constant of 2 pixels for margin. The labels inside these two columns are anchored left and right (leading space to container and trailing space to container), with an 8 pixels margin. This ensure no label ever bleeds beyond its column.

  1. Consider that the height of your UITableViewCell is the largest of the 2 inner columns. In other words, containerView.height >= left.height and containerView.height >= right.height.
  2. Ensure you are not deleting any of the invisible labels. view.hidden will not disrupt your constraints, and that is what you want.
  3. Anchor each UILabel left and right to container, the uppermost to the container as well, but every subsequent label.top should be anchored to the .bottom of one above it. This way, your content will flow. You can add margins if you want.

(*) The final key is to tie the height of each column with a constraint on the column to equal the .bottom of the lowest label for that column. In the example above, you can clearly see that the right column, with a blue background, is shorter than the left one.

enter image description here

While I see you wanted a solution in code, I created my example using a Storyboard in less than 15 minutes. It is not merely a concept, it is an actual implementation. It has exactly 0 lines of code, and works on all iOS devices. Incidentally, it has also 0 bugs.

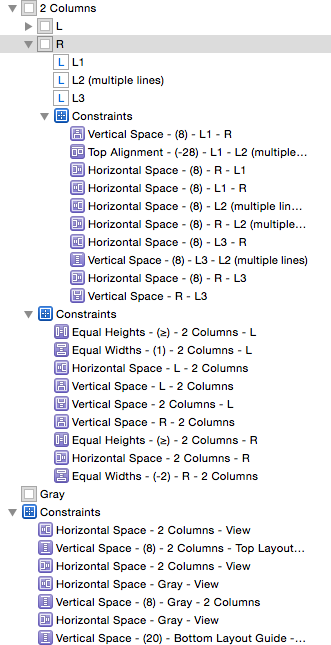
List of All Constraints

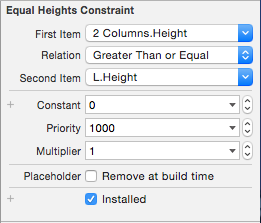
Notice the >= sprinkled here and there. They are the key to making your columns independently tall.

The NSLayoutContraint are virtually identical for L and R.

enter image description here

enter image description here

Get the Storyboard here, and a detailed article there.

Galicia answered 4/8, 2015 at 8:20 Comment(9)
I am aware of the power of the XCode IDE but almost our entire Xamarin.iOS app is built from code. I also have containers for the L and R columns. I am deleting some Views but that is prior to setting up Constraints and that drives the reuse Identifier. Can you explain the difference between setting Leading\Tailing space to Left and Right Constraints. I think I am doing what u suggest in "Final key". I will go back over our code. ThanksCoimbatore
Could you please a screenshot of the Constraint properties in XCode for those ">=" constraints. As you can see from the white "backgrounded" screen shot I am no longer getting clipped labels and I am not touching the Hugging or Compression. What part of your solution prevents the Labels from taking up so much space?Coimbatore
"container.bottom = lowestLabel.bottom" just looked and I am doing the opposite, I am setting "lowestLabel.bottom = container.bottom". Will review nowCoimbatore
It's been a busy day sorting out other issues. I have started editing our constraints and hopefully I will be successful. Would you you be able to share your Storyboard as a gist? gist.github.comCoimbatore
I am not getting any LayoutConstraint warnings. The constraining of container.bottom = lowestLabel.bottom, does it matter where that Constraint is added to? It's a TableCell and I am adding it to the cell's ContentView. It is the ContentView that I am using as the container of the two columnsCoimbatore
With my understanding of your approach i no longer have the Labels taking up too much vertical Space, however the Label's are displayed outside of their TableCell and once scrolled are clippedCoimbatore
I don't want to Clip. Which routine do you think i should revisit? I never calculate the Height of the Table cells, I rely on the content to do that and RowHeight = UITableView.AutomaticDimensionCoimbatore
Any thoughts on the fact that I am using the TableCell's ContentView as my "2 columns" container?Coimbatore
Small enhancement for those searching how to avoid L growing in case R is bigger: just give the "2 Columns".bottom = L.bottom constraint a smaller priority (say 250). So both L and R can grow then independently.Gyratory
C
3

I've accepted SwiftArchitect's answer however seeing as I was after a code based approach for a TableCell I will add a separate answer. Without his help I would not have been able to get this far.

I am using MVVMCross and Xamarin iOS and my TableCell inherits from MvxTableViewCell

Creation of SubViews

From the ctor of the Cell I create all the necessary UILabels and turn off AutoResizingMasks by setting view.TranslatesAutoresizingMaskIntoConstraints = false

At the same time I create two UIViews leftColumnContainer and rightColumnContainer. These again TranslatesAutoresizingMaskIntoConstraints set to false.

The relevant labels are added as subviews to the leftColumnContainer and rightColumnContainer UIViews. The two containers are then added as SubViews to the TableCell's ContentView

this.ContentView.AddSubviews(this.leftColumnContainer, this.rightColumnContainer);
this.ContentView.TranslatesAutoresizingMaskIntoConstraints = true;

The UILabels are all data bound via an MVVMCross DelayBind call

Setting Layout Constraints (UpdateConstraints())

The layout of the TableCell is conditional on the data for the cell with 5 of the 8 labels being optional and 4 of the 8 needing to support wrapping of text

The First thing I do is pin the Top and Left of the leftColumnContainer to the TableCell.ContentView. Then the Top and Right of the 'rightColumnContainer' to the TableCell.ContentView. The design requires the right column to be smaller than the left so this is done using scaling. I am using FluentLayout to apply these constraints

this.ContentView.AddConstraints(
                this.leftColumnContainer.AtTopOf(this.ContentView),
                this.leftColumnContainer.AtLeftOf(this.ContentView, 3.0f),
                this.leftColumnContainer.ToLeftOf(this.rightColumnContainer),
                this.rightColumnContainer.AtTopOf(this.ContentView),
                this.rightColumnContainer.ToRightOf(this.leftColumnContainer),
                this.rightColumnContainer.AtRightOf(this.ContentView),
                this.rightColumnContainer.WithRelativeWidth(this.ContentView, 0.35f));

The calls to ToLeftOf and ToRight of are laying the right edge of the Left Column and the left edge of the Right Column next to each other

A key piece of the solution that came from SwiftArchitect was to set the height of the TableCell's ContentView to >= to the height of the leftColumnContainer and the rightColumnContainer. It wasn't so obvious how to do these with FluentLayout so they are "longhand"

this.ContentView.AddConstraint(
              NSLayoutConstraint.Create(this.ContentView, NSLayoutAttribute.Height, NSLayoutRelation.GreaterThanOrEqual, this.leftColumnContainer, NSLayoutAttribute.Height, 1.0f, 5.0f));

            this.ContentView.AddConstraint(
              NSLayoutConstraint.Create(this.ContentView, NSLayoutAttribute.Height, NSLayoutRelation.GreaterThanOrEqual, this.rightColumnContainer, NSLayoutAttribute.Height, 1.0f, 5.0f));

I then constraint the top, left and right of the first label in each column to the column container. Here is an example of from the first label in the left column

this.leftColumnContainer.AddConstraints(
                this.categoryLabel.AtTopOf(this.leftColumnContainer, CellPadding),
                this.categoryLabel.AtRightOf(this.leftColumnContainer, CellPadding),
                this.categoryLabel.AtLeftOf(this.leftColumnContainer, CellPadding));

For each of the labels that are optional I first check the MVVMCross DataContext to see if they are visible. If they are visible similar constraints for Left, Top and Right are applied with the Top being constrained to the Bottom of the label above. If they are not visible the are removed from the View like so

this.bodyText.RemoveFromSuperview();

If you are wondering how these cells are going to work with iOSs Cell Reuse I will cover that next.

If the label is going to be the last label in the column (this is dependant on the data) I apply the other key learning from SwiftArcthiect's answer

Let [the columns] calculate their ideal height by adding a single height constraint to the bottom of the lowest label (leftColumn.bottom Equal lowestLeftLabel.bottom)

Dealing with cell Reuse

With such a complicated set of Constraints and many optional cells I did not want to have to reapply the constraints everytime the cell was reused with potentially different optional labels. To do this I am building and setting the reuse identifier at runtime.

The TableSource inherits from MvxTableViewSource. In the overridden GetOrCreateCellFor I check for a specific reuseIdentifier (normal use) and if so call DequeueReusableCell however in this instance I defer to a routine encapsulated in the custom Cell class that knows how to be build a data specific id

protected override UITableViewCell GetOrCreateCellFor(UITableView tableView, NSIndexPath indexPath, object item)
        {
            MvxTableViewCell cell;

            if (this.reuseIdentifier != null)
            {
                cell = (MvxTableViewCell)tableView.DequeueReusableCell(this.reuseIdentifier);    
            }
            else
            {
                // No single reuse identifier, defer to the cell for the identifer
                string identifier = this.itemCell.GetCellIdentifier(item);

                if (this.reuseIdentifiers.Contains(identifier) == false)
                {
                    tableView.RegisterClassForCellReuse(this.tableCellType, identifier);
                    this.reuseIdentifiers.Add(identifier);
                }

                cell = (MvxTableViewCell)tableView.DequeueReusableCell(identifier);    
            }

            return cell;
        }

and the call to build the id

public string GetCellIdentifier(object item)
        {
            StringBuilder cellIdentifier = new StringBuilder();

            var entry = item as EntryItemViewModelBase;

            cellIdentifier.AppendFormat("notes{0}", entry.Notes.HasValue() ? "yes" : "no");
            cellIdentifier.AppendFormat("_body{0}", !entry.Body.Any() ? "no" : "yes");
            cellIdentifier.AppendFormat("_priority{0}", entry.Priority.HasValue() ? "yes" : "no");
            cellIdentifier.AppendFormat("_prop1{0}", entry.Prop1.HasValue() ? "yes" : "no");
            cellIdentifier.AppendFormat("_prop2{0}", entry.Prop2.HasValue() ? "yes" : "no");
            cellIdentifier.AppendFormat("_warningq{0}", !entry.IsWarningQualifier ? "no" : "yes");
            cellIdentifier.Append("_MEIC");

            return cellIdentifier.ToString();
        }
Coimbatore answered 5/8, 2015 at 14:33 Comment(0)
C
0

First of all we should not play around wit content-Hugging or compression priority unless there is a situation where you need to change with no option left. The default 250:750 ratio given by apple will suit 90% of the scenario, if auto layout is properly configured. Only in rare cases where there is a conflict for the engine to resize the view based on the fulfilled constraints, we should change hugging/compression priorities.

Your original issue is your labels are being squashed. The labels by default enables intrinsic content size of system, where the engine will decide the label's width and height by default depending upon the labels content and text size. So if you decide your label not to extend the view, then you should set trailing constraint from your right side of your label to the view. In general it will be set to “Equals” property which will not suit our requirement because our label relayed on intrinsic property and we should not provide a standard width to the label. Hence instead of ‘Equals’ it should be ‘Greater than or equal to’ property to the trailing property.

In your scenario, you should not fix height constraint for labels and enable word-wrap feature along 'with number of line’ property for any required label of two line.

you are aware that you should always need to display ‘Yellow label’, ‘green label’ and ‘violet label’ in the right side view, irrespective of the left view has one or two line in the ‘red label’.

So fix a static height for the cell. In right hand side view, Fix top constraint for the ‘orange' label, and bottom constraint for the ‘yellow’ label. So that centre ‘red’ label will get a explicit height which can accommodate one/two lines according to the requirement. And give sufficient constraints to the right side view to fulfil your requirement.

If this is not solving you issue or any discussion upon my solution, comment below.

Cotidal answered 4/8, 2015 at 7:30 Comment(0)

© 2022 - 2024 — McMap. All rights reserved.